Step by Step Installation and Configuration of vCenter Log Insight
1. Click the File Menu and Select "Deploy OVF Template"
5. Click Next to Continue
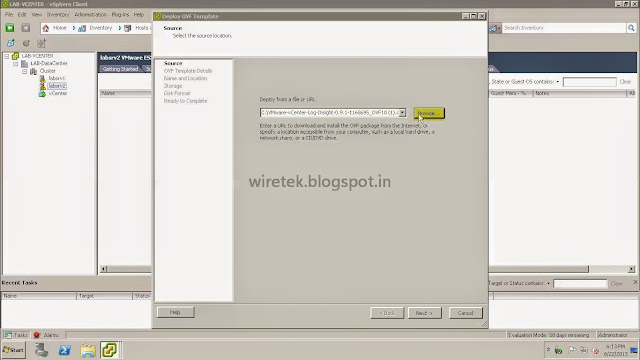
1. Click the File Menu and Select "Deploy OVF Template"
2. You can specify the path to an ova file, Click Browse to select the downloaded file.
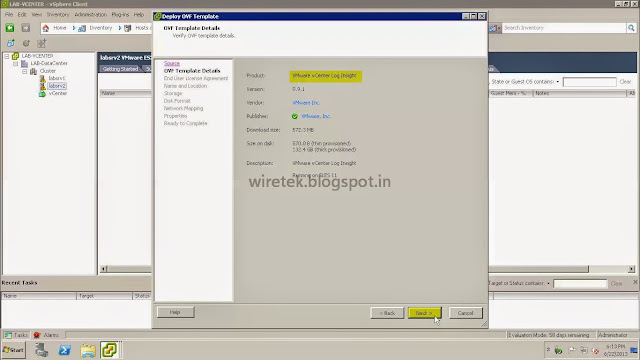
3. Summary of the OVA file is given below and Click Next
4. Accept the EULA before you can proceed.
5. Click Next to Continue
6. Select the VM name (or leave it default) and Location where VM is deployed.
7. Select the data store you want to store the VM file, mostly Common Data Stores are Selected.
8. You also need to select the disk format you want to use : Thick Provision Lazy Zeroed, Thick Provision Eager Zeroed, and Thin Provision. In our case we have Selected Eager Zeroed.
9. You need to configure network parameters this time, by leaving them blank you use DHCP or otherwise you can manually specify the Gateway, DNS, IP, Subnet and Hostname.
10. This is Last Page of Setup, Just Review the Configuration an Click Finish.
vCenter Log Insight is deploying.
Click Summary to check VM Details.
Sizing and adding more resources to this VM
By Default minimal configuration is added to VM so before you power on it, you may want to increase CPU's, RAM and Storage.
Refer VMware Guide Lines for Sizing of vCenter Log Insight.
After Modifying the VM according your requirement, Power on. following screen appears after a couple of minutes.
if you want to change root password, you can follow on-screen instrution to switch to a console and change it. Default Password is blank.
Configuration
Installation is completed and initial configure is done, need to follow few more steps for complete configuration of vCenter Log Insight Appliance.
1. Put the URL on the Browser and Enter, A Configuration wizard will open. (Example : http://192.168.1.1 )
2. Set up the admin password for Log Insight UI, note : this is different from the root password for the virtual appliance.
3. Enter License Key.
4. Enter the email address where you want system notifications to sent to.
5. Time is very Important for Log Insight since it accepts time series data as input. You can setup either Internal or External NTP Servers and you can also sync with ESXi Servers.
6. You will need to set up SMTP in order to enable outgoing emails for alerts and system notifications.
7. If you want to collect tasks, events, and alarms from a vCenter server, you will need to enter its credentials here. Enter required information and click Test to check the connectivity.
if you want to send Log Insight alerts to vCenter Operations Manager, you can enter its credentials here too
8. If data archiving is required, you will need to check this box ( enable ) and provide NFS location.
9. Restart is required after completion of this configuration.
Now vCenter Log Insight is ready, to test and Configure ESXi to send logs to Log Insight
1. Login in Log Insight using root password ( if you are logging in for first time, the password may be blank)
type configure-esxi. it will show you the script.
Some examples to use configure-esxi
2. Once you configure the ESXi hosts using script, you can go to the URL and load the default vSphere content pack Overview page. Now you should be able to see log messages are flowing in.
We are done with the configuration of vCenter Log Insight, Thank you
Contact if any support required, email : reachwiretek@gmail.com


Step By Step Installing And Configuring Vcenter Log Insight >>>>> Download Now
ReplyDelete>>>>> Download Full
Step By Step Installing And Configuring Vcenter Log Insight >>>>> Download LINK
>>>>> Download Now
Step By Step Installing And Configuring Vcenter Log Insight >>>>> Download Full
>>>>> Download LINK